

Happy Birthday
![]()

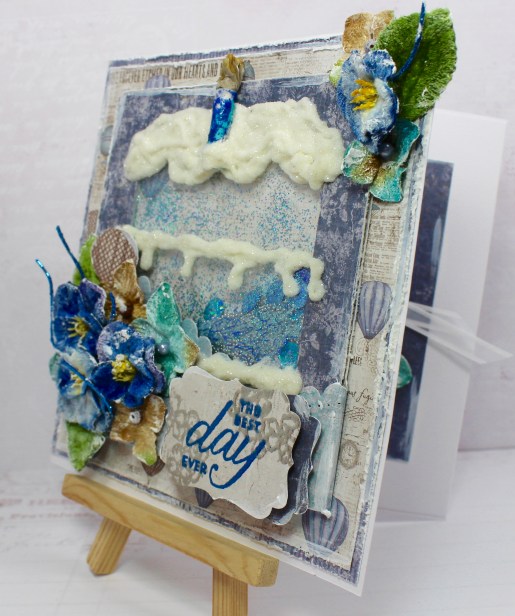
It’s Heather today giving you a short pictorial on making a shaker card. I got the idea from a friend at work to make one in a cake theme, so this is what I came up with.

To start of the process I find my paper collection I want to use and the flowers. Everything else can fit in later.


So I chose some Maja Designs and Petaloo Velvet Blooms. I usually make a couple cards at at the same time in case there is an absolute disaster. We all have them.


I cut my card stock to make a 6×6 inch card. and cut 2 sheets background paper to be layered. To make the Shaker portion of the card I cut both papers 4 3/4″ square. Cut one square centered and towards the top.


You can buy special plastic sheets to use for your window. But you can also use the plastic packaging from your supplies. The Petaloo packages work great. I say “use what you have,” just make sure they are not scratched up.
Measure out the plastic and cut to cover the window. Use some double sided tape, and cover around the whole opening, you don’t want any of your yummy filling falling out.


Position the plastic film and then use some foam tape to repeat the process.


Now for some fun. I like to use a variety of fillers. The more the better. It is surprising how much filler is actually needed to get the effect. After playing, gently remove the backing of the foam tape and put the background paper on to seal the chamber.


I used a scalloped boarder die and another sheet of paper to make the pocket for the shaker. This also gives you a bit more to adhere all the goodies and embellishments to.


So after some scoring and folding, its time to adhere to the card base. I used some double sided tape.


Time for some frosting. I love the Prima Snowflake paste, I need to find some more projects to use it on, so why not here. I use the piping technique, put a fair amount in a baggie, snip the corner of the baggie and go to town. (Start by cutting a tiny corner off, and then cut more if needed.)


I added some extra glitter to the paste while it was still wet.


Flower cluster and sentiment time.


The Petaloo Velvet flowers add some great texture to any project, but I wanted to soften them up a smudge to work better with the paper selection. I just dry brush on some white 13@rts Gesso until I get the look I am looking for.


Now for some closeups.


I used a straw and some tissue paper to make the candle.


If you have any questions on the process, just let me know. These are fun cards to make and you can make them in any shape or size .
If you are in the area.
Plan a day trip! Crops -Classes-Fun
926 North Monroe St
Tallahassee, Florida
Tel: 850.270.6366 Toll Free 800.231.7119
Enjoy the day
~Heather


Supplies Used:
Maja Designs Vintage Summer Basics, Vintage Autumn Basic
Spellbinders A2 Curved Boarders 1,
Sizzix Frames 4
Petallo Velvet Pansies Red, Chantilly Velvet Hydrangeas, Velvet Pansies Royal Blue, Vintage Velvet Dogwood
Prima Snowflake Paste
Lindy’s Stamp Gang Embossing Powder
13@rts Ayeeda Gesso, Silver Microspheres Silver, Microspheres Gold
Other Supplies:
Stampin’Up Birthday Blossoms, Banners Punch; Ranger Embossing Dabber, Tim Holts Distress Stickles; Sequins from My one stash; Double Sided Tape, Foam Tape.